RelysHub host guide
Run a support desk for every client you host
This guide is for the people who host desks on RelysHub: the platform admin who onboards organizations, and each organization's admin who sets the desk up for their team and customers.
Overview
RelysHub is one platform that serves many organizations. Each organization gets its own customer portal, support widget, agent desk, knowledge base and reports. Their data is kept apart at the database level, so one organization can never see another's tickets, customers or settings.
Customer portal, guest form with an email tracking link, the website widget, and agents creating tickets for callers.
Routing rules pick a department or agent, SLA timers start, the customer is notified, and agents see it live.
Roles and sign-in
| Role | Where to sign in | What they do |
|---|---|---|
| Platform admin | /login, then “Platform admin sign in” | Onboards organizations, sets plans and features, issues invoices, watches platform health. |
| Organization admin | /login with the organization's short name | Configures the organization's desk and team. Also works tickets. |
| Agent | /login with the organization's short name | Works tickets in the real-time desk, writes knowledge base articles if allowed. |
| Customer | /portal/<organization> | Registers, raises and tracks tickets, replies, rates the support received. |
| Guest | Portal or website widget, no account | Raises a ticket and follows it through the private link sent by email. |
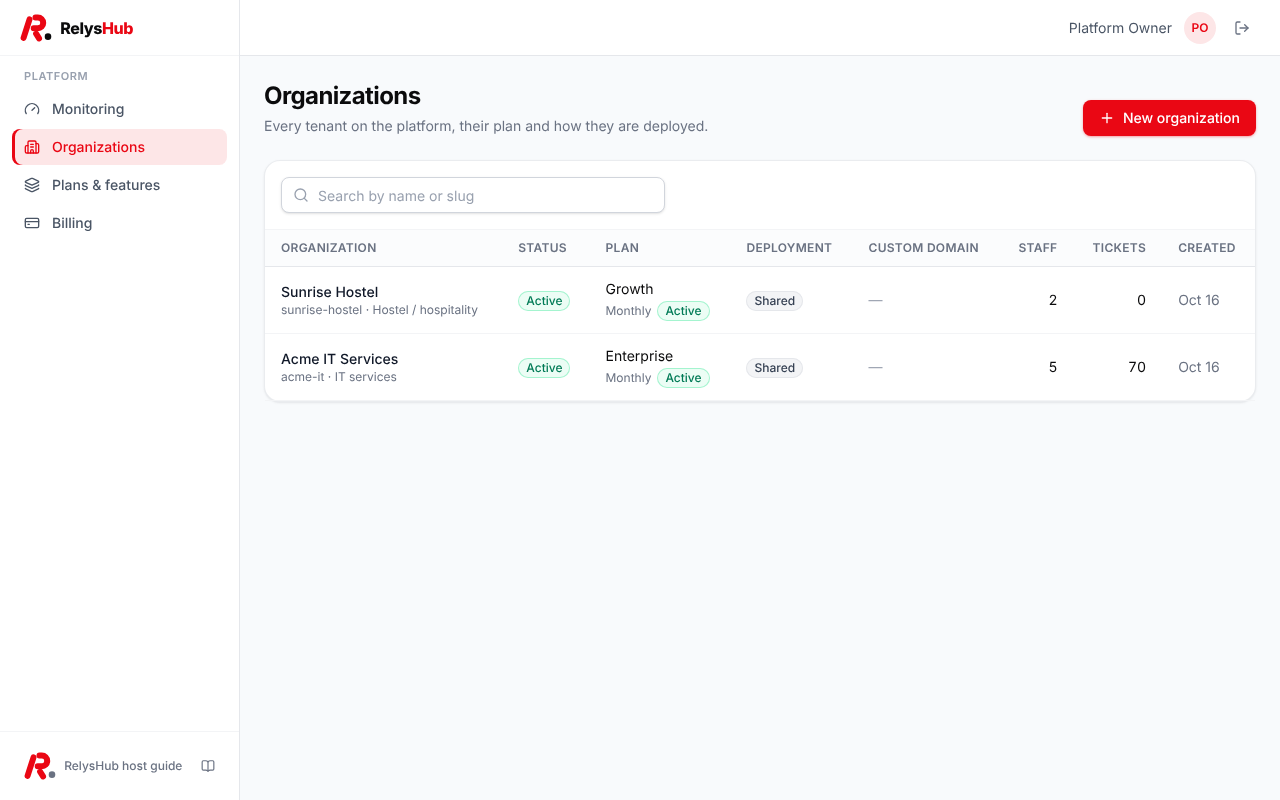
Onboard an organization
- 1Sign in as platform admin and open Organizations.
- 2Choose New organization. Enter the organization name, a short name (used in URLs, such as acme-it), the admin's name and email, the plan and the time zone.
- 3Pick the deployment: Shared uses this platform's address (/portal/acme-it); Dedicated serves the organization on its own domain, which must point at this server.
- 4Create it. RelysHub generates a sign-in password for the admin and shows it once, together with their sign-in link. Copy it and send it to the admin through a secure channel.
Plans, features and billing
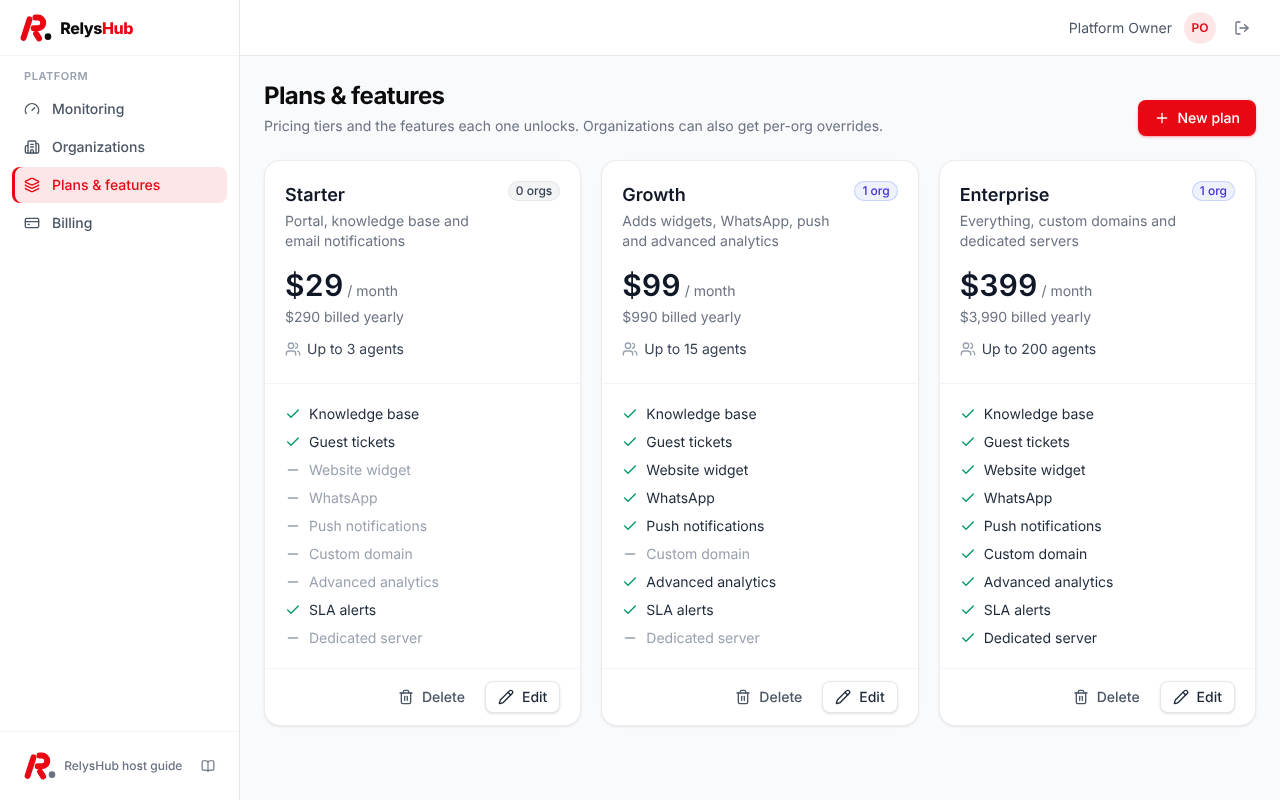
Plans set the monthly and yearly price, the number of agent seats, and which features an organization can use. Features can also be switched on or off for a single organization from its page, which overrides its plan.
- Features include the knowledge base, guest tickets, the website widget, WhatsApp, push notifications, SLA alerts, advanced analytics, custom domains and dedicated servers.
- Subscription on an organization's page changes its plan, billing cycle, status (trialing, active, past due, canceled) and renewal date. Use Suspend on the same page to block an organization from signing in.
- Billing lists every invoice. Generate an invoice from an organization's page, then mark it paid when payment arrives.
Monitor the platform
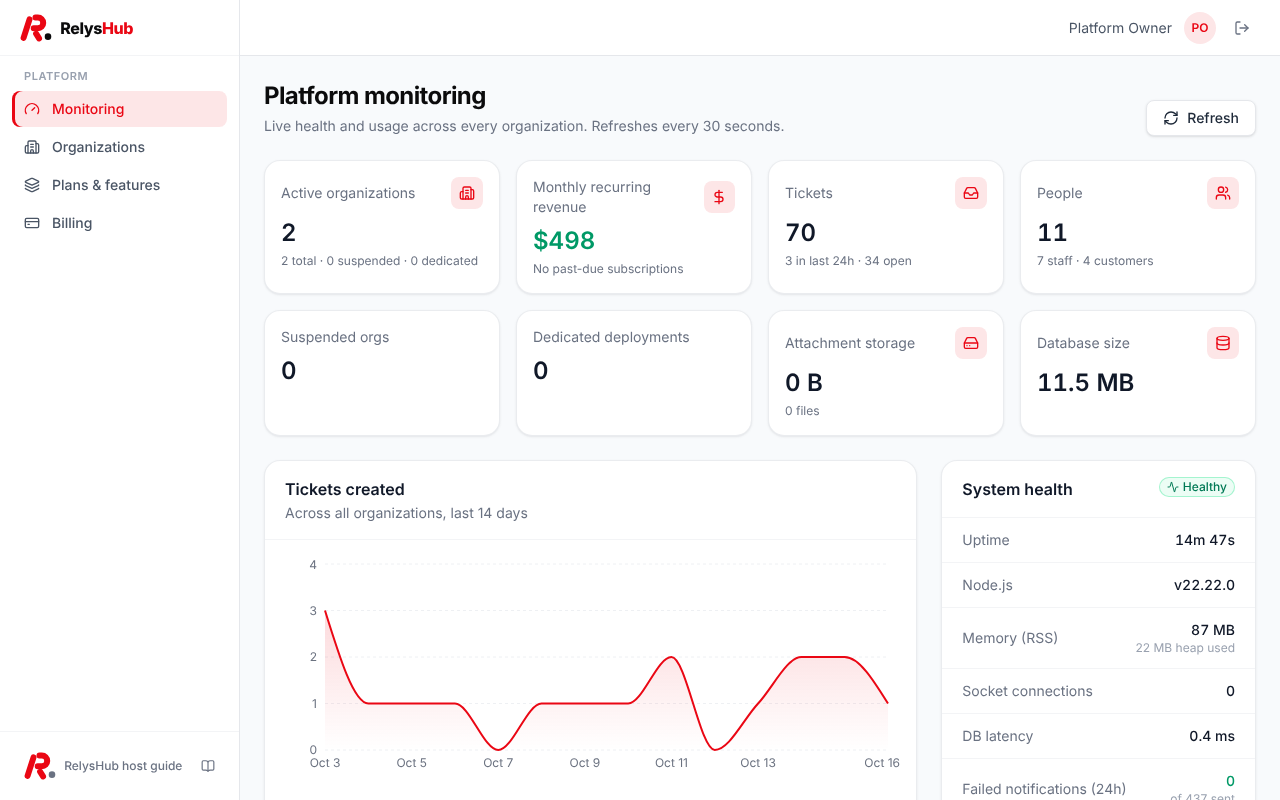
The platform dashboard shows organizations, active agents, tickets created across the platform in the last 14 days, open SLA breaches, and usage by organization, so you can spot a client who is growing fast or one that is struggling with response times.
First-day checklist
Sign in with the credentials the platform admin sent you, then change your password from your profile. Work through these in order; each takes a few minutes.
- 1Organization. Upload your logo, choose your brand color, set your time zone and business hours.
- 2Team & roles. Create departments, invite agents, and give each the right role and tier.
- 3SLA & automation. Set response and resolution targets, and routing rules for each kind of request.
- 4Ticket forms. Add the fields you need from customers, such as order number or device.
- 5Knowledge base. Publish answers to your most common questions.
- 6Guests & widget. Decide whether guests may raise tickets, then embed the widget on your website.
- 7Channels. Connect your email server, and WhatsApp or push if your plan includes them.
Branding, domain and hours
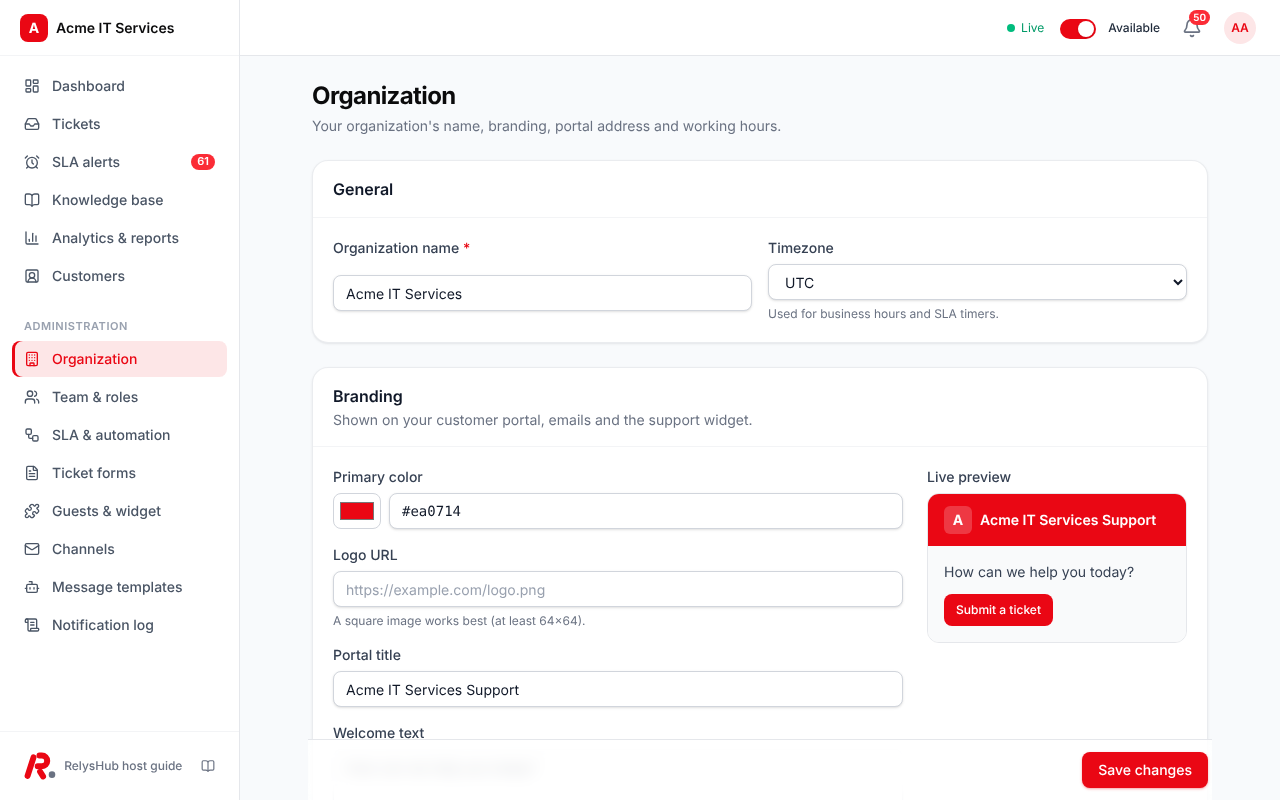
Go to Administration → Organization.
- Branding: logo, primary color, portal title and welcome text. The color is used across your portal, emails, widget and the agent desk.
- Business hours: the days and times your team works, in your time zone. SLA timers can count only these hours, so a ticket raised on Friday evening is not overdue by Monday morning.
- Plan & portal: your portal address and plan. A custom domain is set up by the platform admin.
Team, roles and departments
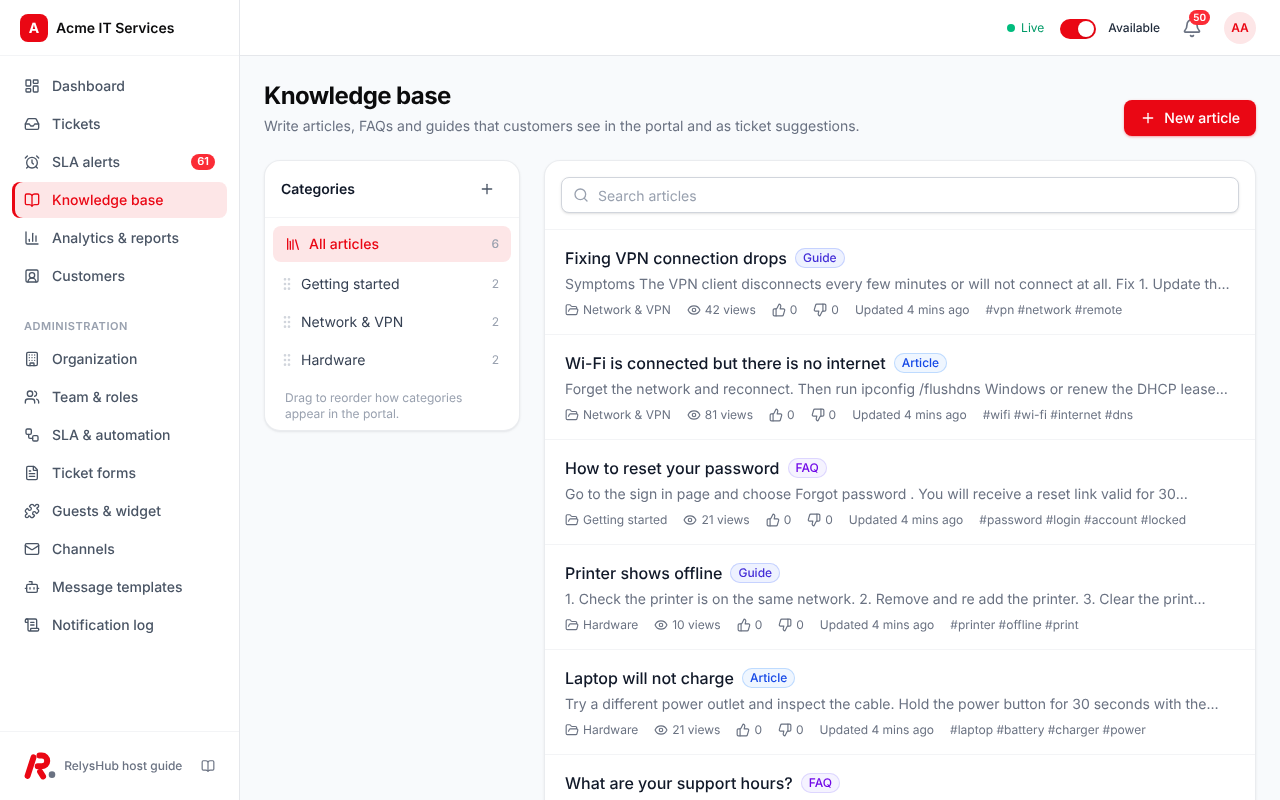
Go to Administration → Team & roles.
- Staff: add a person with their name, email, role, department and tier. They receive a sign-in password you can copy. Set someone to Away to stop new tickets reaching them; their open tickets are reassigned automatically.
- Roles: tick exactly what each role may do, such as view all tickets, reassign, edit the knowledge base, or see analytics. Built-in roles cannot be deleted.
- Departments: group agents by team (for example Network, Facilities, Billing). Routing rules can send tickets to a department.
- Tiers: tier 1 handles new tickets; escalation moves a ticket to tier 2 or 3 agents.
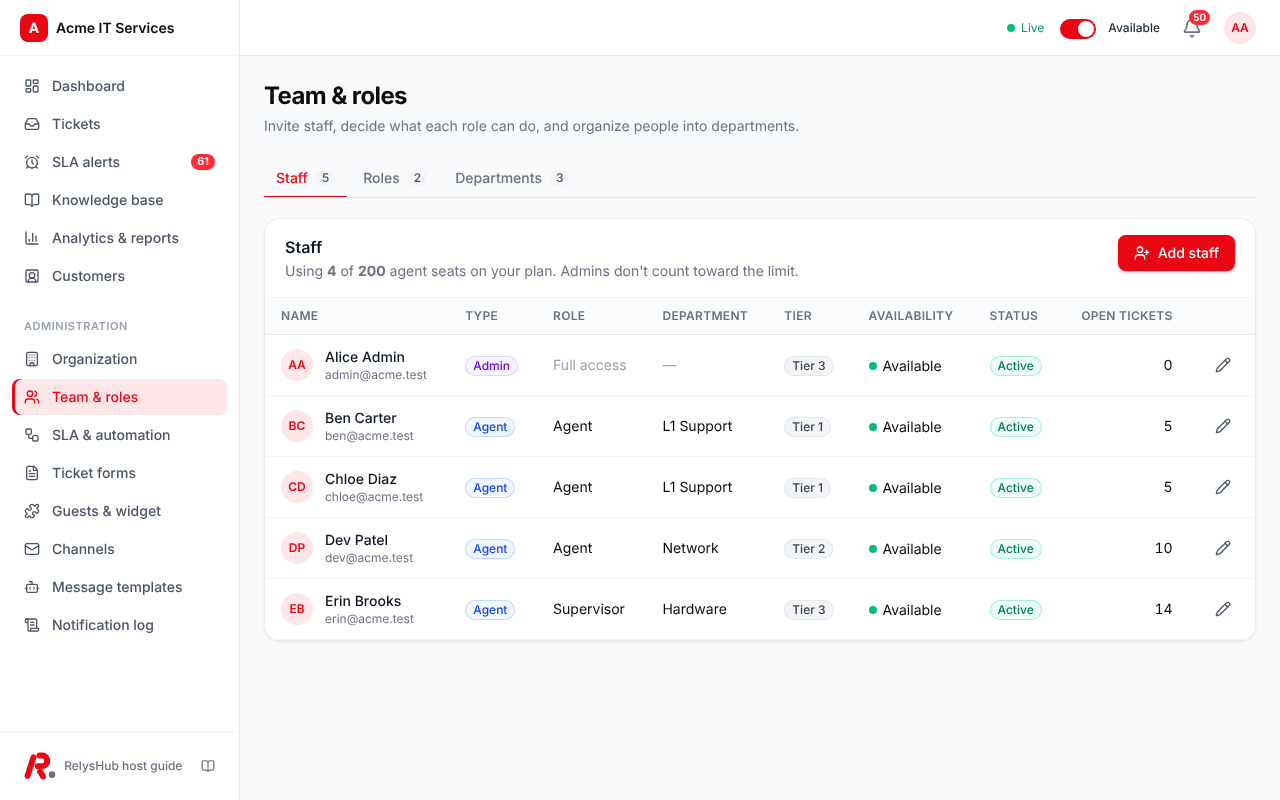
SLA rules and routing
Go to Administration → SLA & automation.
- SLA targets: first response and resolution times for each priority (low, normal, high, urgent), and whether they count business hours only.
- Routing rules: run top to bottom. Each matches on category, keywords, priority, where the ticket came from or the support tier, then sends it to a department and optionally a preferred agent or a new priority. The first active rule that matches wins.
- Assignment & alerts: turn on automatic assignment (least busy available agent in the department), fall back to any available agent when nobody in the department is free, reassign tickets when an agent goes away, and set how long a customer may wait for a staff reply before an alert.
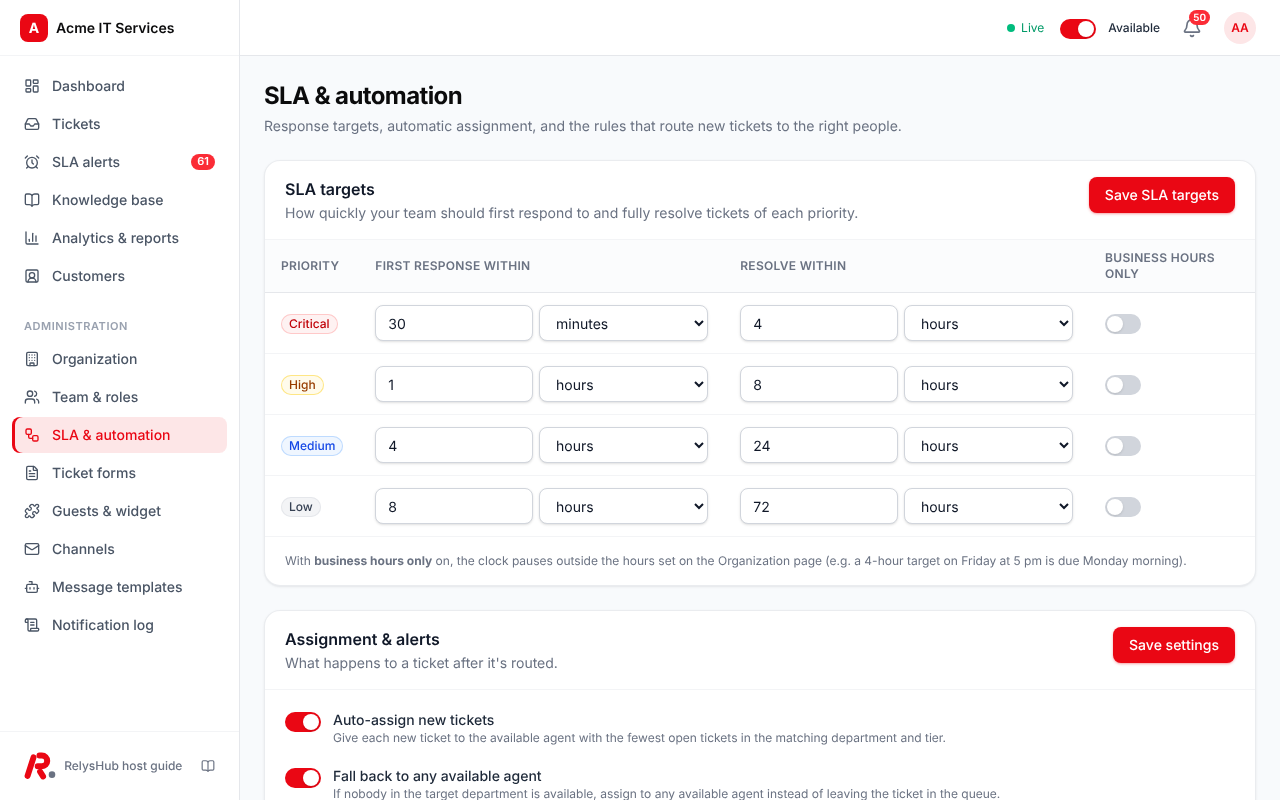
Ticket forms
Go to Administration → Ticket forms. Drag fields to reorder them, choose a field to edit its label, help text, options and whether it is required. Field types are short text, long text, dropdown, file upload, email, phone, number, date and checkbox. Subject and description are system fields and always present.
You can keep several forms (for example one for IT and one for HR). The default form is used on the portal and widget.
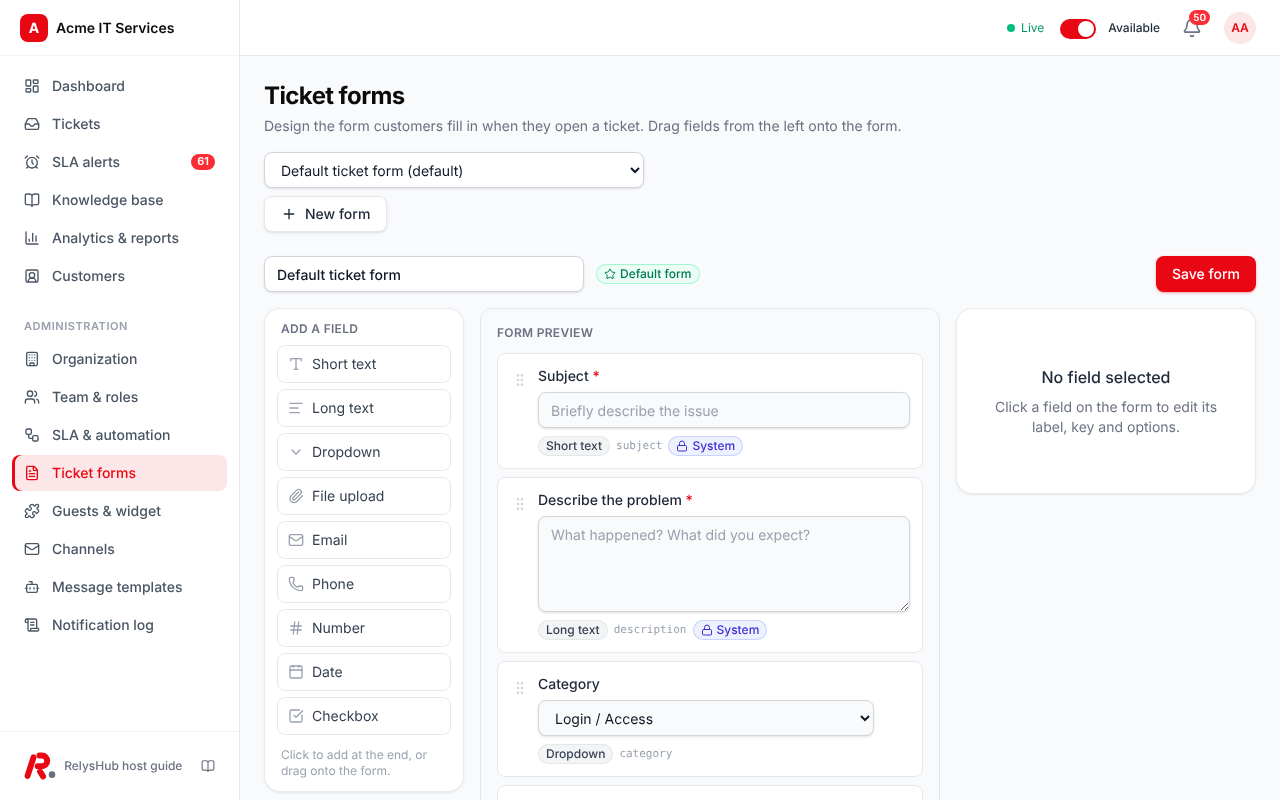
Knowledge base
Go to Knowledge base. Write articles, FAQs and guides in Markdown, add keywords and a category, and publish. Published articles appear on your portal, are suggested to customers while they type a new ticket, and are suggested to agents inside each ticket.
Guests and the widget
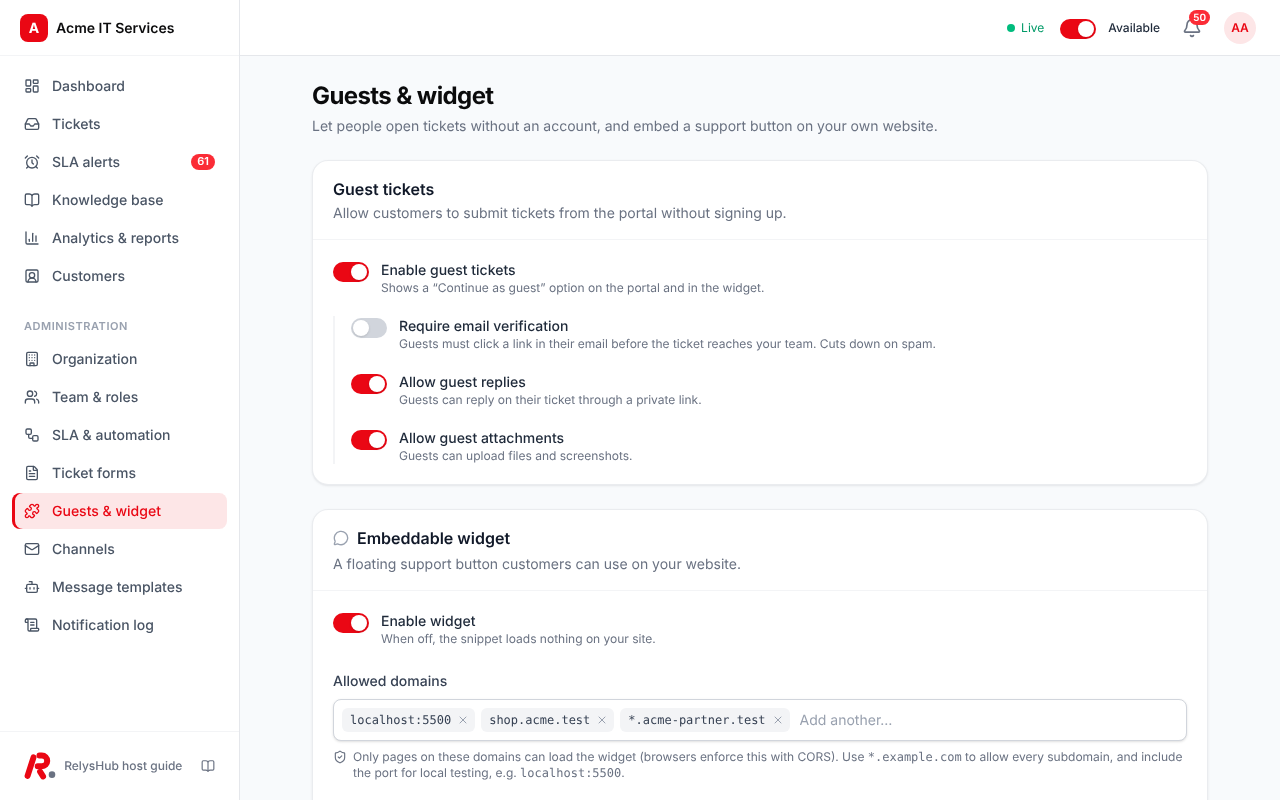
Go to Administration → Guests & widget.
- Guest tickets: when on, people can raise a ticket with just their email. They receive a private link to follow and reply to it.
- Allowed domains: only these domains may load your widget. Use
*.example.comfor every subdomain and add a port for local testing, such aslocalhost:5500. - Embed: copy the one-line snippet and paste it before
</body>on your website. A support button appears in the corner you chose.
Channels and templates
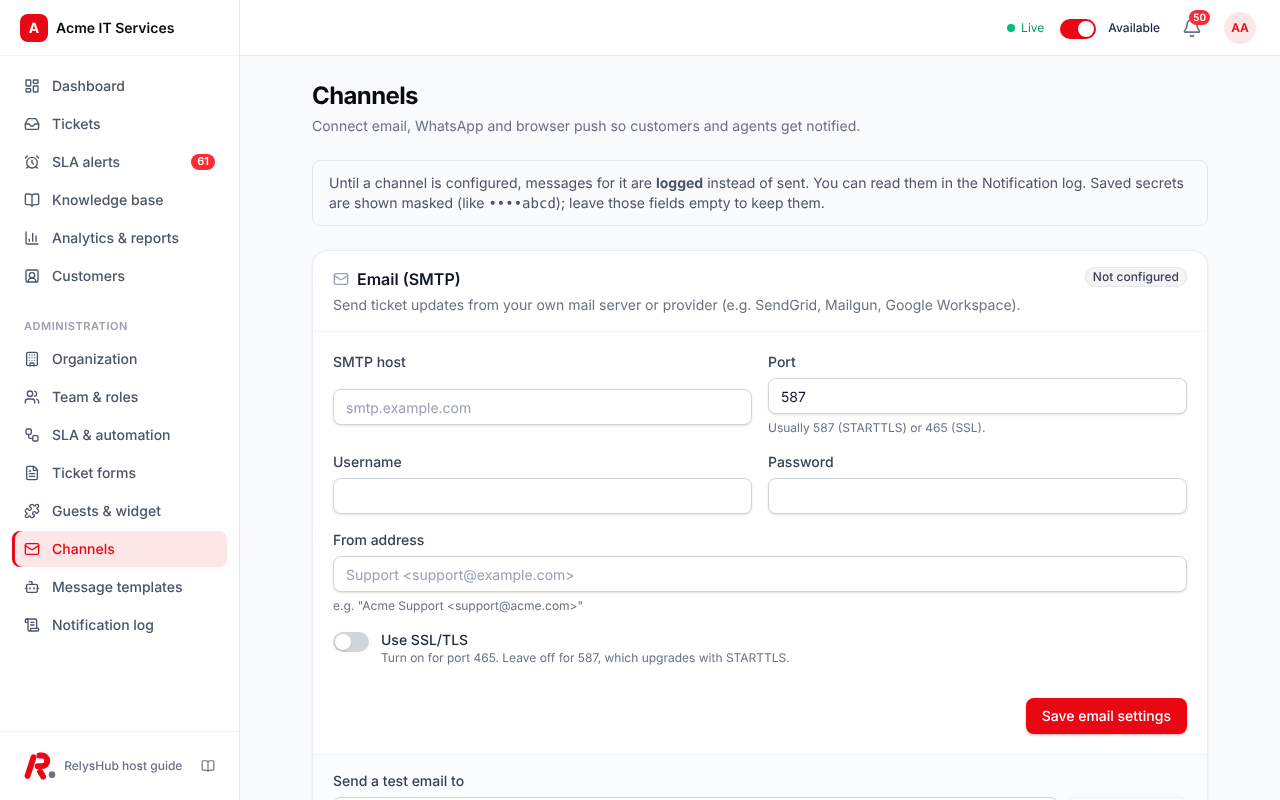
- Email (SMTP): host, port, user, password and the sender address. Use Send test to check it before going live.
- WhatsApp: your provider's API key and sender number, when your plan includes it.
- Push: agents enable browser push from their profile to get alerts even when the desk is closed.
- Message templates: edit the email, WhatsApp and push text for each event (ticket created, agent reply, status change, SLA warning). Placeholders such as
{{ticket.number}}are filled in automatically. - Notification log: every message sent, with its status, so you can confirm a customer was told.
Analytics and reports
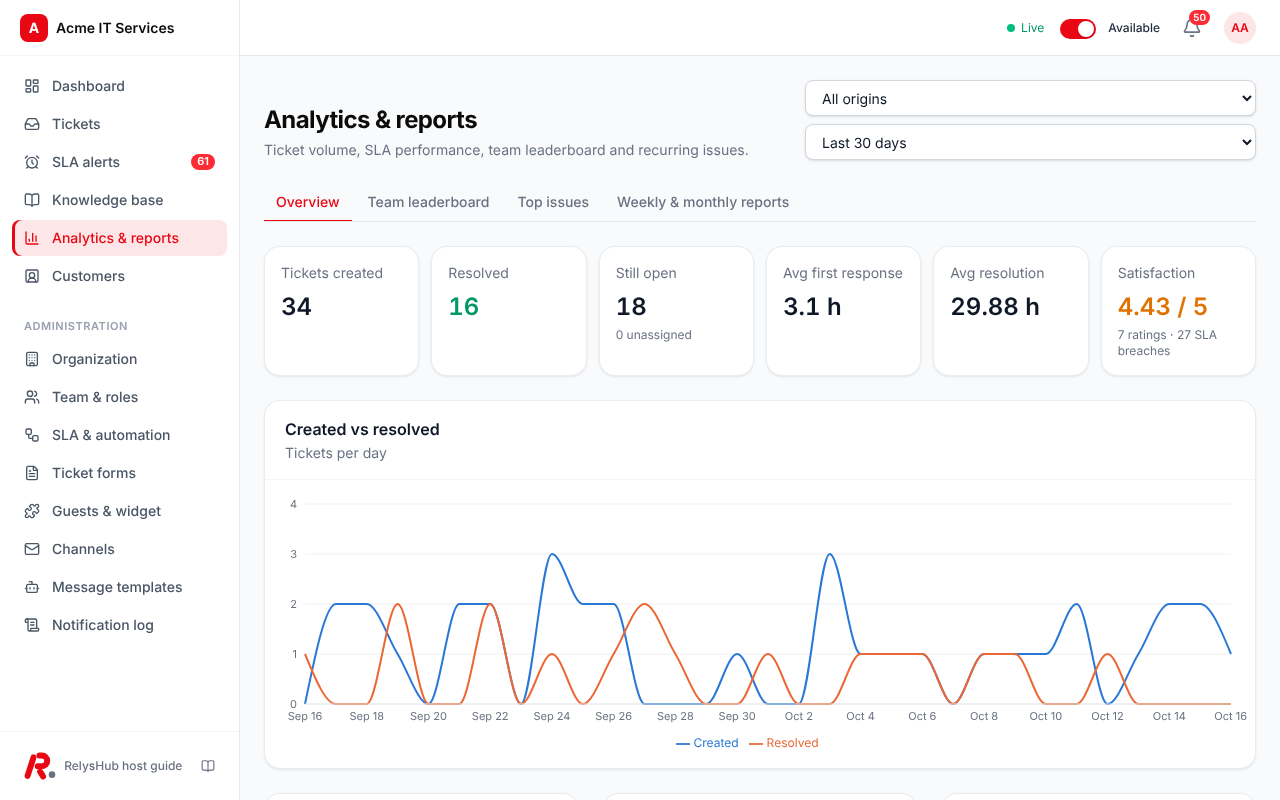
Go to Analytics & reports and choose a range (last 7, 30 or 90 days, last 12 months, or custom dates). Overview shows created versus resolved tickets, response and resolution times, SLA compliance, tickets by origin (the central portal versus each widget website) and repeat customers. Team leaderboard ranks agents, Top issues shows the busiest categories and recurring terms, and Weekly & monthly reports can be downloaded as CSV.
Working tickets
- Dashboard: your queue, unassigned tickets, SLA risk and live activity. Toggle Available to start or stop receiving new tickets.
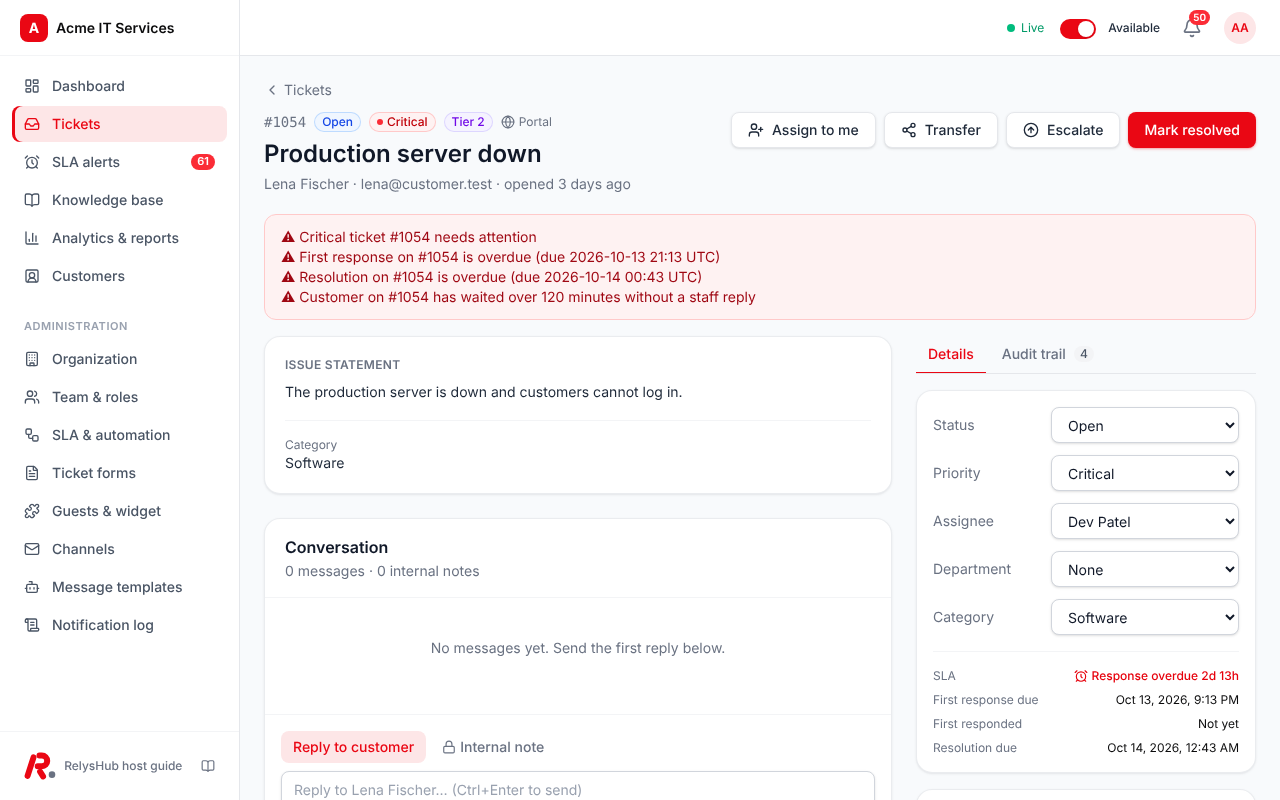
- Ticket workspace: reply to the customer or add an internal note, attach files, change status and priority, and tick off the action plan checklist.
- Suggested fixes from the knowledge base appear beside each ticket; read one, or send it to the customer with a click.
- Reassign or escalate to another agent, department or tier. Every change is recorded in the audit trail with who did it and when.
What customers see
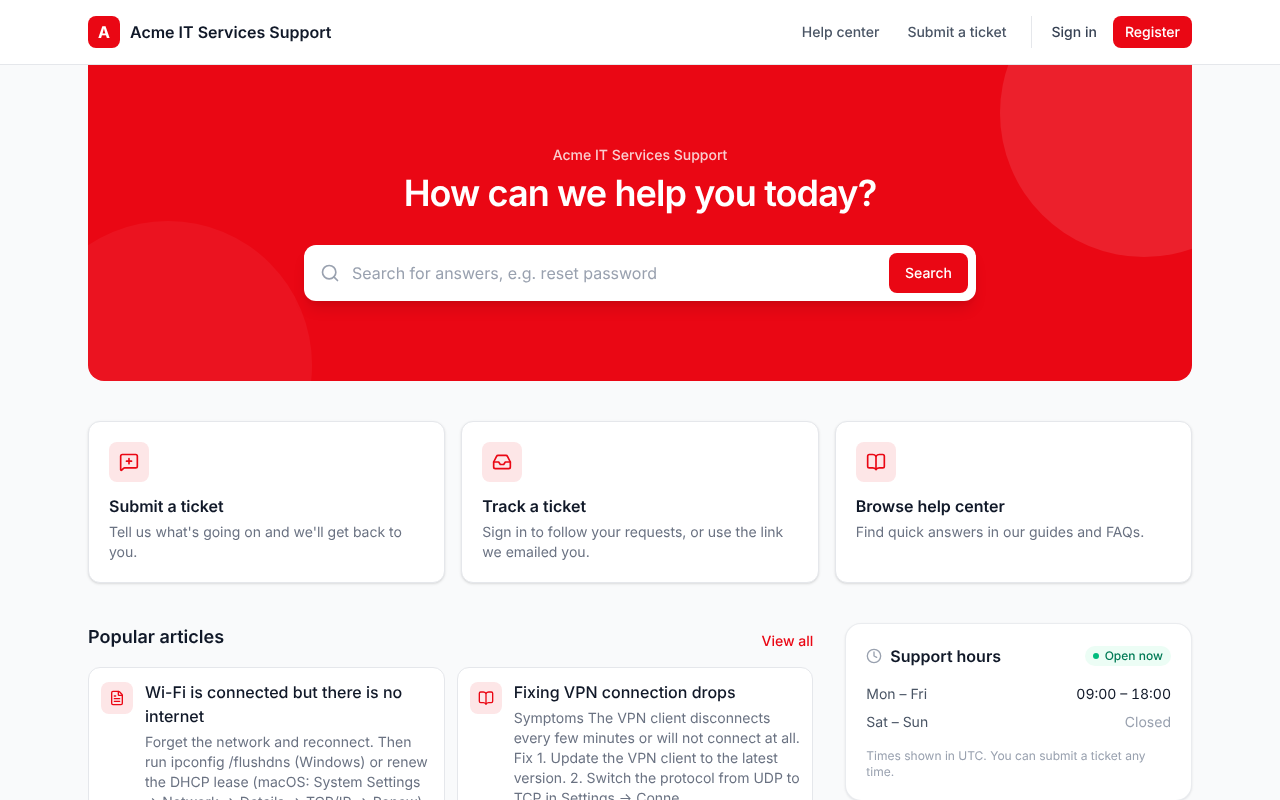
Your portal shows your branding, a search box over the knowledge base, and buttons to raise or track a ticket. Customers see replies the moment agents send them, can reply, close or reopen a ticket, and rate the support once it is resolved. Ratings and comments show up in analytics.
Troubleshooting
The widget does not appear on our website.+
Add the site's exact domain (including any port) under Allowed domains, make sure Enable widget is on,, and check the snippet's data-org value matches your short name.
Customers are not receiving emails.+
Check Channels → Email with Send test, then look in Notification log for the error returned by your mail server.
Tickets are not being assigned.+
Make sure Auto-assign new tickets is on, at least one agent in the target department is Available, and Fall back to any available agent is on.
An agent left the company.+
Deactivate them in Team & roles. Their history and audit trail are kept, and the freed seat can be given to someone else.
We need our own domain.+
Ask the platform admin to switch the organization to a dedicated deployment and point your domain's DNS at the server.